Showing posts with label ideas. Show all posts

Saturday, February 22

Rag Curls How To & Social Media

Just thought I should first inform you, dear friends, that I got an Instagram last month (just a tad late jumping on the wagon) and I love it because I can basically keep in touch with family and friends (and strangers haha) better through pictures. It's pretty awesome. You can find my Instagram page right here if you want to follow me or whatever ;)

Also, if you are looking for a really fun blog to follow, go check out The Freckled Fox (cutest name ever, huh?). I absolutely love it and have spent far too much time the last few days stalking Emily (the writer) and her adorable life (she also is in her early 20s and already has 4 babies! Awesome!). Also, she started following my blog today which--and this probably sounds silly, but--was like the most exciting thing ever for me. I kind of freaked when I noticed (Dalin was like "What?!" because I sort of yelled). Anyway, go follow Emily on her blog right now, and if you aren't following me already (but you read here a lot), you can follow me on the left. I think you can turn off email notices or something and I would if I were you because no one needs anymore junk mail in their inbox...seriously. I unsubscribe to everything so I completely understand why you wouldn't want that in your life.

But on to what you probably came here for--the rag curls tutorial.

Rag Curl Tutorial

The best part about this hairstyle is that it uses no heat (which means less damage to your lovely hair), it happens overnight so you can wake up with an amazing 'do, and besides being really easy, it has great results! And I'm serious when I say it's easy--I've always had a hard time styling my own hair because I didn't have a sister or anyone to practice on growing up (thankfully now I have a daughter so I can try everything on her ;). Plus, I like that you can do these sitting in bed in about five minutes.

What you need:

An old rag or shirt you can cut up
Scissors
Warm water (preferably in a little spray bottle if you have one)
A comb
Hairspray or gel


1. You will cut your fabric of choice (I think cotton or something similar is best because it doesn't slip as easily) into 12-15 strips, each about 8-10" long and 1" wide. I have thick hair and 14 worked for me.

2. Lightly brush your hair (mine gets super tangled and knotty throughout the day, especially in the dry static) so it is workable.

3. Use the comb to pull out a small section of hair, about a quarter size around. Spritz it with water. If you don't have a spray bottle, you can just moisten your fingers in a cup of water and drag it along the strand to get it pretty moist.

4. Take a strip of fabric and place the end of your hair (about an inch from the bottom) in the center of the strip, making a little "t" or "x" or whatever. Pinch the hair to the strip and slowly start to roll upward toward your head, alternating hands to pinch the hair on the strip as you go. Starting is the hardest part especially if you have layers and pieces of hair like to fall out of your section, but once you get the hang of it, everything else is easy. Also don't worry if there are a lot of loose strands--it doesn't affect how your hair will turn out as much as you think.

5. Once you've rolled your hair all the way up to your head, find the ends of the rag with your fingers and tie a simple knot. I do not double knot mine--I just do a simple loop and pull it tight and the moisture and cotton hold pretty well.

6. Continue to work your way around your head doing small sections until every strand is tied up.

7. Spray a little water or hairspray if you want (I hardly use any hairspray at all).

This is what it looks like: 
You'll probably feel like Laura Ingalls or Anne Shirley. 
Side view
Back view
8. Sleep on it. (Yes! Sleeping is involved!) Also, in case you're wondering, I do not find sleeping on the rag curls uncomfortable. I actually probably sleep better if anything because I'm dreaming of waking up to luscious curly hair!

9. Wake up and visit a mirror. You'll probably be all like, "What a disaster," because you look kind of ridiculous. But don't worry, that's just how this works.

10. Un-tie each rag and slide it out of your loop of hair. You will probably have pretty tight ringlets.


11. Pull your fingers through the curls and use product or a little water if you want them to be softer and more natural.

12. Take a picture and go out and enjoy the day, you lovely curly-haired lady!

Some notes: 

  • Tightness and strand size are key. If you want tight, tight curls, use more rags and smaller strands of hair. If you want big, loose curls, use fewer rags and larger sections. 
  • If you do not moisten your hair, do not expect the curls to hold as well. They will probably fall flat in a few hours, especially if your hair does not curl easily in general. On the other hand, if you use water and hairspray, your hair can last as long as three days still looking great! 
  • If you wake up and a rag has slid off in the night, don't stress! Just use a curling iron to tidy up that strand and any other loose ones you may have missed. Chances are tidying up will only take you about five minutes. I am pretty good at tying the rags up and rarely, if ever, have to use an iron. 
Wishing you happy & gorgeous hair days, 
By the way, please let me know if you try these! I would love to hear how they turned out for you!
Also, if you already do rag curls, is this the technique you use?
Are you following The Freckled Fox or my blog yet?? If not, get to it! 

Wednesday, February 19

Homemade Facials & A Semi-Crisis


A few things. Thing number one, my blog is having an identity crisis. It's not me, it's my blog I swear. We simply can't agree on anything right now. Mainly appearance-wise. This font or that one? This color or that? There are just too many things. So if you either have a suggestion or see something you just love or hate, please comment and tell me! I love opinions. I am an opinion leach. That sounds disgusting. An opinion vampire. Let's just say I eat opinions for breakfast, then let them digest, and finally make my own decisions based on the ideas of others. 

Thing number two: I tried a homemade facial today. Honestly, it felt awesome but I can't indefinitely conclude that it did anything. I took photos just in case to record this momentous moment (seriously, it's like the third or fourth facial I've ever done) so you can see for yourself and decide if it did anything.

At any rate, I had fun doing it and it was really simple.

Needed: 
1 tsp. honey
1 tsp. olive oil
1 tsp. baking soda
It looked like this no matter how much I mixed it. Stinking honey. But it worked out fine. 
Before:
Don't forget to put you hair up! For real. 
During: (After you've plastered it all over your face)
It looks like a troll sneezed on my face
It did NOT taste good thanks to the baking soda
Side Profile
Pause a moment to check out this cutie while waiting for the facial to "soak in" ;)
After rinsing it off:
That's it, folks. I saw ones where you can substitute an avocado or egg yolk in, and while I happened to have both of those things on hand today, I wasn't in the mood for cracking an egg on my face (though admittedly, the honey and olive oil looked and felt pretty much the same as an egg). 

Happy day! 
signature
What do you think?
Did the facial do anything at all? 
Do you have a facial recipe that seems to help your skin? 
(Also, don't mind my lack of make-up. I didn't go out today so I was kind of like whatever.)

Wednesday, February 12

Pretty Much Authentic Thai

I'm telling you right now, this stuff is good. And if you ask me, it really tasted like authentic Thai (which was really exciting!!!).

I was pretty apprehensive to try this out to be honest, being a lover of Thai food and doubting my personal ability to match the distinct taste of Thai, but after successfully executing the last couple of new recipes I tried, I figured, why not? Now the only con with this dish that I can think of is that some of the ingredients required are not ones you would typically purchase. So if you're a cheap-o like I usually am, you may want to save this dish for a special occasion when you feel like splurging (it wasn't that much though, and at least with a few of the ingredients, they should last you a while once you buy a bottle or jar.)

The recipe I was looking at came from Pinterest (of course) and suggested making it in a slow cooker. While I had originally intended to do that, after reading the comments, I decided I wasn't going to be able to wait four hours. So, as per usual, I improvised. And either I got really lucky or I'm just a decent chef because it turned out stupendous! I am only saying this because I was very surprised that it was as good as it was. Also, I cut the recipe in half possibly because I did not expect it to live up to my high expectations of Thai food but I'm giving you the full recipe because you will most likely want to have more. Anyway--no time to waste--here it is: 
Ingredients*
Chicken. I bought just regular old sliced chicken in a package. I think normal people slice up raw chicken meat before cooking it but well, frankly I hate touching raw chicken so I wait until it's cooked mostly and then sever it into pieces (which is way harder, but at least I'm salmonella-free). Also, I would probably have liked to have more chicken next time because it was really good, but any amount will suffice if you cut it up enough. 
2 cups chicken broth. The original recipe said chicken stock. I didn't know what that was, but chicken broth worked like a charm so I don't see the problem.
1 onion, chopped
1 heaping Tablespoon fresh ginger, minced
1 red or orange bell pepper, sliced
2 Tablespoons fish sauce
2 Tablespoons brown sugar
2 12oz. cans of coconut milk
2 Tablespoons red curry paste (with a sprinkle of regular curry--at least, that's what I did)
2 Tablespoons peanut butter (or peanut oil works I've heard, but hey, I wasn't buying that when I already have 4 containers of peanut butter here)
1 cup frozen peas, thawed
2 fresh limes (for juice)
Fresh cilantro
Salted cashews, chopped

White rice OR Maifun rice sticks (which are noodles)

*Truthfully, I was a mad woman with this recipe and didn't measure anything except the brown sugar (as shown in the picture). I completely estimated, which is kind of dumb and risky for a first-time attempt at a new recipe, but, like I said, it turned out so I probably got lucky. I felt like a real chef though just tossing junk in so that must be worth something. 

Instructions
I cooked this recipe in a skillet (awesome wedding present--thanks Jared and Maren!) because it has a lot more space than a frying pan and I don't like dirtying up multiple pans or dishes unnecessarily (well, who truly does when you are the dishwasher...). 

Add the chicken (sliced) to your pan or skillet and cook, flipping it over to cook it through. Then mix in the chicken broth, chopped onions, minced ginger, sliced bell pepper, and let cook for a little while. Next, mix in the fish sauce (which smelled horrible at first--I thought, Oh no! The dish is ruined!), the brown sugar, the coconut milk (which was part liquid, part condensed stuff, which worried me that I got the wrong thing, but I think that's how it's supposed to be), the red curry paste, and the peanut butter. Stir things around quite a bit. (I read that the coconut milk can curdle if you don't stir it well). You're sauce should be a creamy orangey color and will start to smell amazing if you're doing it right. 

Meanwhile, in another pot, cook up some white rice or if you want to perpetuate the Thai theme, use rice sticks, which are inexpensive and very good with the meal. Rice or rice sticks take about ten minutes to cook so plan accordingly. 
Once you feel that things back in the pan or skillet are cooked through well, stir in the frozen peas and cook for a while longer. I tasted a pea to decide when they were done. Just make sure that they're squishy to the touch at least. 

The last ingredients may seem like they are just for appearances, but I would not skip out on them because I think in some ways, they make the dish. They can, however, be added after the sauce is complete. I did squeeze lime juice in while cooking and also after I dished it. The fresh cilantro on top was awesome, as were the salty cashew pieces. And the lime juice definitely creates noticeable zest. 
The flavors of this dish are incredible. If you like pad Thai, I'm fairly certain you will love this. It made it into our top ten favorite dishes that I make. That's a pretty impressive feat in itself. 

Shopping List- Here is a list of ingredients and locations to help you shop:

I bought the Thai ingredients at Wal-Mart in the Raman Noodles aisle and they were all in the same location (the can of coconut milk, fish sauce bottle, jar of red curry paste, and rice sticks--which cost about the same as regular spaghetti but seems to make a lot more). The fish sauce and red curry paste should last a while and were less than $3 each. If you wanted to make the dish again, you would probably just need to get coconut milk, possibly more rice sticks (though next time I won't cook the whole package), and the fresh stuff.
I bought the ginger root, onion, bell pepper, cilantro and 2 limes in the produce section. 
I bought the sliced chicken breast in the meat department. 
And don't forget the chicken broth and cashews! 

I already had brown sugar, peanut butter, and frozen peas (and the chicken broth, bell pepper, and lime, but that was just by chance). 
Picture of all the ingredients together
And one more pic of the final dish for good measure. 
Please do not hesitate to ask any questions about this recipe in the comments below! 
Also, I would love to hear if you try it out or make any changes. (You won't regret it!)

Saturday, February 1

Perfect Party Punch

This drink is so easy (and so delicious), you won't know what to do with yourself. My mom always made this for parties and it was always my favorite. Plus, after bringing it to the last two get-togethers the little Gunnell family has gone to, everyone loved it so I thought it was only fair that I share it.

Ingredients: 
1 can frozen pink lemonade
1 can frozen grape juice
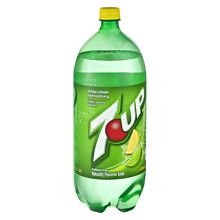
1  2-3 liter bottle of 7-Up OR Lemon Lime Shasta OR Sprite

Optional-
Sherbet Ice Cream
Fresh raspberries

Instructions:
In large punch bowl or large juice serving container, dump the frozen lemonade and 1/2 (or more depending on how much you like grape) of the frozen grape juice. Then add the lemon-lime soda of choice and mix with a spoon. That's it! It's amazing. If you want to fancy it up--especially if you're serving your punch in a bowl, add scoops of sherbet or fresh raspberries. Sherbet ice cream goes PERFECTLY with this drink.

Note: If you find the drink to be too sugary for you, you can always water it down without ruining the flavor--the frozen drinks are intended to be used with water.

I have to admit, I always thought that this drink was self-explanatory and that everyone knew how to make it until I brought it to those gatherings mentioned above and everyone wanted to know what I did.

So tell me, have you had this before? 
What's your favorite party drink?

Friday, January 31

Turning 30 and Easy Green Bean & Tomato Side Dish

I realized something kind of depressing a while ago but just got reminded of it again today.

I turn 23 this year, my daughter turns one, and next Wednesday, my husband turns 24. 

That means in seven years, I turn 30. SEVEN YEARS. Maybe it's just me, but that is no time at all. And 30 sounds ancient (no offense to my family members and older readers...). So after thinking this, then I start to think, "Gee, I want to have seven kids...how am I going to do that in seven years?" I think the answer is clear--I can't. It's not possible. I'd have to have twins to make up some time, but after being pregnant with one regular eight-pound+ baby, I can't even imagine carrying twins (even though we do have the fraternal twin gene in my family, yikes!). So I'm thinking I'm going to have to re-think my Ultimate Life Plan (which is not an official document or anything, but it is an official idea...in my head). It looks as though I will have to have a kid or two after 30. Which honestly, is not that big a deal, I just wanted to be done by then. Also I'm scared of turning 30 because then I'm a real adult. Yeah, apparently I'm an adult right now at 22 but it doesn't really feel like it--even married with a baby--because I am still in love with Disney movies and Harry Potter and pretty much love all the same things I did when I was 16.

But let's put that aside for now because I have other important completely random things to discuss.

Two weeks ago (was it that long?!) Dalin, Tenley, and I went to a little get-together with three other married couples and had some delicious pumpkin chili/soup for dinner and then played a fun game and chatted afterward. We were asked to bring a side and so naturally I googled "side dish" and got
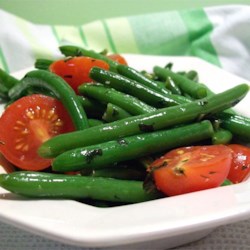
89 million results. Literally 89 million. So then I decided to narrow it down a little and typed in "green bean side dish." (Green beans seemed easy-ish to cook and also I wanted them.) That search got me 10 million results and that seemed manageable. I clicked on the first result and this came up. Well, actually a homepage came up, but after browsing just a tiny bit I saw the picture with those juicy cherry tomatoes in it and I was sold (I love cherry tomatoes. And regular tomatoes). So I ran to Macey's and filled a bag with green beans (Dalin was like, "Why can't you just used canned ones?" and I was like "Ha! YEAH RIGHT!" Good one, honey...), grabbed some cherry tomatoes, and a lemon (because I love adding lemon to stuff). I already had basil leftover from making my yummy bruschetta.

When I got home, the gathering was going to start in 25 minutes so I kind of panicked and forgot the original recipe--I just made it my own. I grabbed my biggest frying pan and hurriedly put some water in--about halfway. I turned the stove on and set the pan of water on it. I grabbed a cutting board and as efficiently as I could, chopped the stem ends off and then cut the green beans in half and tossed them in the pan. It took a while to chop them all so I figure the first in and the last ones were cooked quite differently though it did not seem to effect the dish. Once they were all in, I covered them with a lid to let them steam in the pan. I sliced a yellow onion next and chopped up a few garlic cloves and tossed them into a smaller frying pan with a little butter. Then I started slicing cherry tomatoes in half. I also started cutting up basil leaves (which was basically just slicing them into strips and calling it good). I grabbed my garlic salt and sprinkled it over the tomatoes to let it soak in to the juices. The green beans seemed done and I tossed them into a large serving bowl. I only wanted the tomatoes to be lightly cooked, so I saved them for the end. When the onion and garlic were about cooked, I dumped the cherry tomatoes and chopped basil in with them for just a minute and I put a little bit of sugar in with them. I think I read that a tablespoon would be good, but I was in a hurry and just scooped a little into my hand and sprinkled it on top and mixed it in. After a minute, I dumped everything in with the green beans and mixed it around. I peppered everything heavily and mixed it in, then, in last-minute inspiration, squeezed some lemon juice over it all. I had no idea if my dish was going to be a hit or a disaster. So we went to the dinner and all I can say is I got lucky because everyone loved the side dish. Everyone complimented me on it, especially the lemon taste. It was gone before I knew it (and I had filled a pretty large serving bowl). I was very pleased that it had been so well received and that it was so dang easy to make, which is why I decided to share it with everyone.

This does not belong to me but I had no time (or thought) to take a pic of my own until it was too late.

Easy Green Bean & Tomato Side Dish Recipe

Ingredients: 
fresh green beans (lots! depending on how many people you are feeding)
cherry tomatoes - one container will do
fresh basil leaves
1 yellow onion
a few garlic cloves
tsp. butter
garlic salt
pepper
1 Tbsp sugar*
1 lemon

Instructions:
1. Fill a large pan halfway and put on stove (which should be on medium to medium-high heat).
2. Chop stem ends off of green beans and slice in halves.
3. Put green beans in the pan with water on the stove and cover to let simmer (reduce heat).
4. Chop onion and garlic cloves and sauté in butter in a separate pan.
5. Slice cherry tomatoes in half and shred basil leaves.
6. Lightly sprinkle garlic salt over tomatoes.
7. When green beans are done (they should simmer about 10 minutes), scoop into a serving bowl.
8. Add cherry tomatoes and basil leaves to the onion and garlic mixture in the pan.
9. Sprinkle with about a tablespoon of sugar and mix pan ingredients.
10. Dump pan ingredients in with green beans and stir.
11. Pepper to taste, then squeeze lemon well over the entire dish.
12. Serve warm preferably.

*I eat pretty healthy (not because I really try, I just happen to like fresh foods more) and don't usually cook with sugar (I bake with sugar of course) but I truly believe this step was crucial to the dish's flavor.
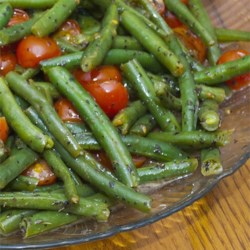
Also not my photo, but still looks good! 
What is your easy go-to side dish for dinners or parties? 
Will you be trying this recipe with dinner or otherwise?
Do you feel like 30 is kind of old?

Saturday, December 21

Gourmet Spicy Sausage Penne

*Things have been changed since I started making this a couple years ago. I now slice up a colored bell pepper to add some extra texture and flavor. I add it after the onion, garlic, sausage have been added. I also cook the penne in the same pan as the other ingredients which increases the flavor though it takes a little longer for the penne to get tender. I no longer melt the cheese on top in the oven (I skip that part). I also put foil down across the baking dish to save cleanup later (HUGE lifesaver if you hand wash your dishes)...scrubbing dried/melted cheese off a dish is not my favorite!*
I realized I haven't shared recipes in a while and thought I had better do so before the end of the year! This is seriously one of our family's favorite recipes ever since I first tried it this past spring at a baby shower. It was made by my friend and visiting teaching companion, Sara, and I knew I just had to get the recipe from her after because it was so amazing that I had like five helpings. I've made it twice when I've made meals for friends in the ward, and both times they loved it and wanted the recipe. Our brother and sister-in-law loved it too. Basically, I've never met anyone who hasn't liked it yet. And my favorite thing about it--it tastes even better the second day!

The recipe has a few random ingredients that I don't buy on a regular basis, so it's more of a once a month thing (though we had it three days ago and I'm making it again tonight, so...yeah it's that good). Anyway here it is for everyone to try!


Ingredients:
penne pasta (follow serving sizes on the bag...I usually use the whole thing because it's so amazing)
olive oil (for frying the sausage in)
1 lb. smoked turkey sausage (sliced)
1 chopped white or yellow onion
2 minced garlic cloves
About 2 cups chicken broth
1 10oz. can Mild Ro-Tel tomatoes with green chiles
1/2 cup heavy whipping cream
1 cup shredded Monterray Jack cheese
sliced scallions
salt and pepper
red pepper flakes

Instructions:

Start with a large frying pan (the biggest you have, probably). You'll be adding a lot of ingredients so the bigger (and deeper) the better. Pour some olive oil in the pan and add the sausage slices, chopped onion, and minced garlic until they have nice brown edges.
Then there are two ways to do the next part. You can either add the dry penne to the frying pan to be cooked with the other ingredients, or you can boil it separately, then mix everything later. Before I got a big frying pan, I used to cook the penne separately, but now that I have a larger one and have cooked it with the penne mixed in with the other ingredients, I HIGHLY recommend that method! I love the flavors that get into the penne. It takes a little longer to cook (the penne is supposed to take 11 minutes but it's been closer to 20 to get to the softness I like) but it is worth it!
So I add the chicken broth, Ro-tel tomatoes (undrained), and heavy whipping cream to the pan and bring it to a boil. I then turn the heat down and let it simmer for five-ten minutes. (If you choose to add the penne to the pan, I would simmer for at least fifteen). I add some salt and pepper, (sometimes chili powder) and red pepper flakes for more spice.
Then, I pour my penne mixture into a baking dish and spread it out evenly. I add the shredded cheese on top, then (note: I no longer do this oven step) I stick the dish in the oven (at 350 degrees) and let it bake until the cheese on top is melted. Usually the mixture is still hot enough that the cheese melts on the top without any assistance.
Once the cheese is melted, I take it out and mix it up again, then sprinkle the chopped scallions on top to serve.

Serve with a baguette slice and a drink--especially if you made it extra spicy!
Tell me if you try this recipe and how it goes for you:)
Also let me know if you make any alterations so I can try them myself. 
I hope you like it! (I'm pretty certain you will!)

Wednesday, December 4

Why I Don't Post Daily

There are a lot of excuses I could give for why I don't write on here daily. Most of them, you could predict. But besides being a busy stay-at-home mom and student, the main reason I don't (and quite frankly, can't) post every day is because I don't want to. I love blogging--really I do. It makes me happy in a way only one who enjoys writing can understand. But I do not like being so connected all the time. (Remember that post I shared a month or two ago with some random things about me? Getting off the grid, or at least wanting to, was on there.)

Let's get one thing straight: Technology is great. I'm so thankful I can be in touch with my parents and brothers and husband and in-laws throughout the days and weeks. But technology is also numbing. You don't have to agree with me, and sometimes I feel like a hypocrite arguing this particular sentiment, but I usually don't feel...what's the word...happy, after being on the computer for hours. When I go on Pinterest and somehow end up staying there for three hours, I feel a little bit sick to my stomach when I think of all the time I wasted pinning amazing ideas to make my home and family and life better. Because pinning isn't doing (though the English language would technically disagree with me). Going on Facebook is another big time waster that I am completely guilty of. Do I really need to read about every detail of everyone's life from their status updates? Nope. I don't. I didn't do it when I was a young teenager, and I don't think I was any less happy back then. Same with email (ha ha, you're thinking, who uses email still?). I hardly go on mine except to erase the dozens of spam messages I receive, but I don't need to waste so much time going through junk.

How is that a waste of time--connecting with family and friends? you may be wondering. Well, everything in moderation, and like any addiction, somehow Facebook and Pinterest and Instagram and Twitter (for some people) have the ability to draw people in and hold their attention for much longer than they intended.

Why is everyone so interested and--dare I say--obsessed with other people's lives? Isn't comparison and judgement what we as Christians are supposed to avoid? We should be seeking after things that are VIRTUOUS, LOVELY, OF GOOD REPORT, and PRAISEWORTHY. We should be working a little harder to grow closer to Christ. We should have sympathy and charity in our hearts. We should be loving those around us to the very best of our abilities.

Boredom is simply no excuse. There are a million other BETTER or BEST things you can choose to do than go on the internet. Read a book. Read your scriptures. Paint. Learn to paint. Visit a friend. Have a friend over. Make cookies for someone. Make a special meal for your husband. Learn to cook. Go grocery shopping. Do laundry. Clean the house/apartment. Play a game with your husband, roommates, children. Write a letter to someone. Do a random act of kindness. Write in your journal. Watch a good movie. Listen to Christmas music. Decorate your house/apartment. Call a friend. Look for coupons and use them. Gather recipes. Make a list. Exercise. Try something new. Do a craft. Learn a craft. Share a craft. Take some photos of your family. Reorganize a desk or room. Learn something new!

That was like 30 things right there off the top of my head. Whatever you choose to do, do it with all your heart. Don't be half-hearted. Be confident and give your best effort!

Most of all, I do not want to be so connected or attached to the Internet because it greatly takes away from the time I have to spend loving and enjoying and teaching my daughter. I can tell you, taking breaks are good and necessary. But there is a significant difference between checking a message and surfing the web for hours. My daughter is little and so precious to me. I may not always be patient with her, but I always want to make sure I enjoy her littleness before it's gone. This is the only time in all eternity that I will have to enjoy it. Some moms can't wait for their kids to grow up. Sometimes I can't wait until Tenley is old enough to play with and bring places and do all kinds of things. But more than that, I want to "let [her] be little" while she has the chance.

The Internet is not always a bad thing. But too much of a good thing is not so good. And as Christians, we should always be choosing not just better things, but the BEST things.

I encourage you to go do some good in the world today! (Or, if it's too late, tomorrow). To steal a line from a favorite Church hymn, "Wake up and doing something more!" You'll be happier for it, I know it. Unplug for a few hours and connect to what really matters--real individuals.

What are some other ways we can do some good in the world?
How and when do you like to unplug from the cyber world?

Monday, November 11

Chair Up-Cycle

I'm writing this post because several people have asked me what I did to give some old chairs a new look, and it was so easy, I just had to share!

When we got married, Dalin's Grammy gave us some awesome, sturdy antique chairs to go along with our antique kitchen table--which was fantastic--especially because I love antiques. We used the chairs for a year as they were, but then I got a little bit tired of looking at the worn pink velvety fabric mixed with maroon-brown. Pretty, right?

So I decided I would give them a make-over with the help of my mom when she came and visited me last December before Christmas. The first thing we did was choose colors. My favorite colors are aqua blue, green, and mustard yellow, so that was easy. We went to Lowe's and with the help of someone in the paint section, chose a can of primer and had them mix three sample sizes of our chosen colors, which were only $3 each! They looked just like the ones in the picture below.
Once we had our paint samples, we drove the Home Fabrics store and chose three different fabrics that would go well with the colors I'd selected and also look good with each other. We bought a yard or so of each, and then headed home to get to work! (We had also picked up a small, inexpensive staple gun while at Lowe's). 

At home, we took the chairs apart one by one. We flipped the chairs over and removed the screws to release the seat part, then I started priming the base of the chair. I set my mom to work, re-upholstering the seat. We decided to leave the pink fabric on underneath ours for extra padding. 

Here is the before picture of two of the chairs. The seats didn't match which annoyed me a little (especially since they were two different shades of pink)--though of course the covers I chose don't technically match either ;)

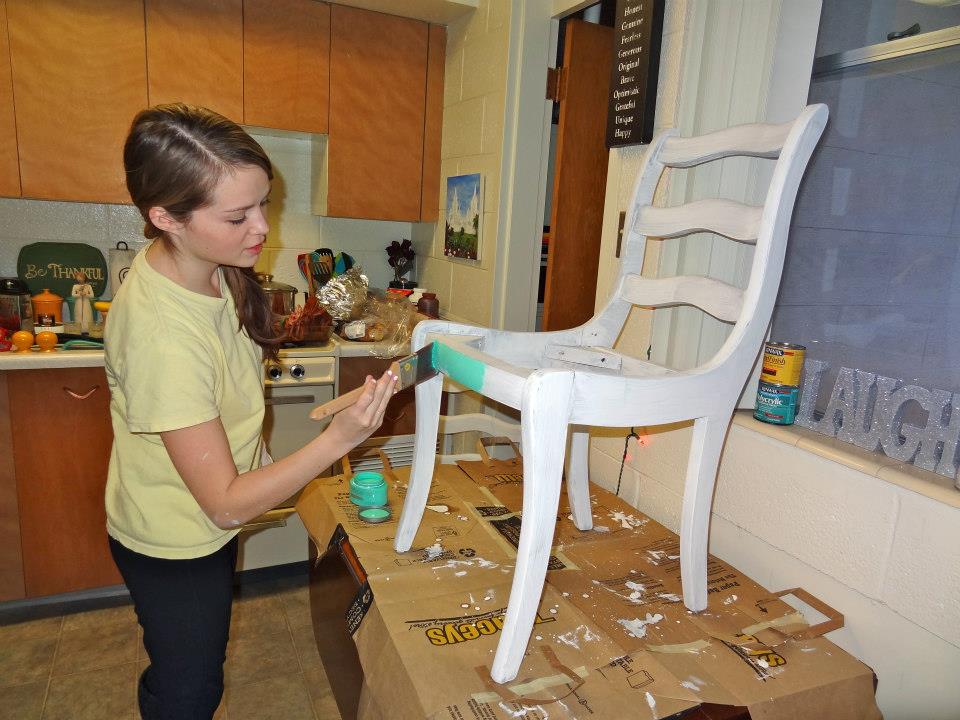
I covered the kitchen table with brown paper and started painting the primer on (you can see the chair in the background that I set on the stovetop to dry is fully primed). I'm not gonna lie--just priming kind of took a while, but my mom and I were excited to see them done, so we spent all evening and late into the night priming and painting.  


Here I am, just about ready to start painting the first chair! (Also, I was one month pregnant here btw)

Here is the final product! The aqua chair:

The green chair:

The mustard chair:

We keep two sitting at the table (because that's all we have room for really in our tiny kitchen) and one nearby for when we have someone visiting. Also, notice how nice our newly stained kitchen table looks! My mom did that for me while she was here last December since I was pregnant and the fumes can be dangerous. I think she did a pretty marvelous job! 


What do you think of our project?
Could we have done anything differently?
Do you have any old chairs or furniture to up-cycle/paint/re-upholster?
Let me know if you decide to do it yourself!